Showing posts with label Tips. Show all posts

Sep 18, 2017

Atlanta Family Photography Tips from Milton, Alpharetta, Roswell portrait artist, Marchet Butler


As an Atlanta-area family photographer, I work with all sorts of age groups and my fair share of pets, not to mention the occasional horse or two. Over the years, I've developed some "best practices" for working with everyone during a session--and I'm going to let you in on my secrets. Here are my top tips to get the best results out of your portrait session with Butler Family Photography.

Get advice on clothing before the session
Besides booking the session, choosing clothes is probably the hardest part of the process! I have a lengthy page about what to wear for your portrait session, and I'm happy to make recommendations. Hint: I generally recommend selecting attire based on where you are going to hang your portraits in your home. 

Complimentary Image Consultation
Clients are also welcome to work with my image consultant and makeup artist, Deborah Fawaz, to determine best colors to wear as well as hair and makeup tips for the session. Deborah has generously offered a complimentary 30-minute image consultation to any client who books with Butler Family Photography during the 2017 season. Thanks Deborah!

Think about having portraits at your home
In general, we come to our clients' home to do most of our sessions. We find that holding the session in a familiar place makes the process go a lot smoother. Clothing options, bathroom facilities, and air-conditioning or heating is readily available. There's also something wonderful about having a family picture in a place that has a special meaning to you.  

Let the photographer handle the smiles
At the session, it's time to let the photographer take charge. That means if a grandchild isn't smiling or a sibling is feeling rebellious, don't scold or reprimand. Kids need time to warm up to the idea of having their portrait taken, so it's okay if they aren't cooperative at first. We have lots of tricks we can use to get smiles. The main takeaway here is that people smile naturally when they are having a good time, so we do our best to make the session a fun experience. Oh, and please, don't say cheese. The "cheese" smile is unnatural and not flattering. We have much more funny things to say to get a better smile (and maybe a laugh) out of that shot. 

Choose a professional
Being a family portrait artist isn't an easy occupation--there are so many moving parts to handle when posing a group, coaxing out smiles, even getting the dog positioned just right all while coordinating lighting, exposure, and other technical aspects of photography. As a Certified Professional Photographer, I've been vetted by my peers and regularly participate in continuing education with some of the top photographers in the nation. You're in good hands when you choose Butler Family Photography!

Contact us for more information about booking your family session.


Marchet Butler is a family, high school senior, and headshot portrait photographer in the Atlanta area. Specializing in fine art wall portraits, she creates one-of-a-kind custom-framed pieces for the home. Contact us for more information about working with Butler Family Photography for your holiday or Christmas pictures this season!


Jun 9, 2017

Five Tips for Making Portraits Part of your Summer Plans


The other day I was looking for some recent portraits of my family that weren't selfies or quick snapshots, and I realized it had been over a year since we'd had formal portraits taken. I used to be so good about doing formal portraits every spring and fall, but with our lives getting more busy and with my business growing, it's been hard to prioritize family portraits. However, we are going to have them done as part of our vacation this summer. And I'm so excited!

I know I'm not the only one who has good intentions about having portraits done but never get around to them. (I even bought a new outfit for my son which, I'm sure, he has grown out of by now!)

That's why a call to a photographer to get your session on the calendar really helps move the process along. If I had set a date for those portraits instead of waiting for "when I had time", I'm sure we would have done them by now. So, lesson learned. I've got a date and a location for our next family portrait session and now I just need to make sure we have the right clothes for the occasion -- it's going to be a formal portrait. Did I say I was excited?!

Here are 5 tips for getting your portrait session plans moving this summer:

  1. All Together this Summer? Schedule Portraits. This season is one of the only times some families are together -- especially if older ones are off in college or have their own families and live farther away. As kids and families get older, there are only certain times that a family portrait is possible. Make sure to take advantage of the occasion to have a family portrait.

  2. Have Portraits Taken while on Vacation. If you are going on a trip, plan to have portraits taken as part of the experience. Many cruises have photography sessions available, and there are seasoned photographers who do portraits in popular vacation spots. Check out the Professional Photographers of America "Find a Photographer" resource for a qualified photographer in the area. By the way, if you are vacationing in the Atlanta-area, I'm available for Atlanta family portraits.

  3. Plan a Family Portrait Session before the Wedding. Summer is a popular time for weddings, so if you have a wedding in the family, consider having a family portrait session a couple days before the wedding. My family did this before my brother's wedding several years ago and I'm so glad we did. It is the only portrait we have of everyone in the family including grand kids and spouses. I'm not sure we have all been together in the same place since then!

  4. Hit the Beach First, then the Portrait Session. Have a beach vacation planned this summer? A lot of my clients like to have their portraits taken after they've had a little sun. Scheduling your session a week or two after you get home from vacation is great. It lets you have a bit of a rest from your vacation and you'll still have your summer tan. You can even wear a new outfit you bought on vacation!

  5. Book Fall Sessions Now. Want to wait until fall when the leaves are changing and the weather is a little cooler? Book your September, October, or November session with your photographer now. Fall is the busiest season for family photographers and spots fill up fast. Getting your date on the calendar now is the best way to ensure you'll have that spot you want.

If you are in the North Fulton area (Milton, Alpharetta, Roswell, Cumming, Johns Creek), we'd be thrilled to take care of your family portraits!

Summer is a great time for portraits, especially in the evening when the light is so beautiful and it has cooled down a bit. I regularly create portraits at my clients' home -- where we have an air-conditioned space to duck into between takes. And yes, we can do them indoors instead if it's raining or if it's too hot outside.

We regularly do weekend sessions because we know that's when families can be together. Contact us for more information.


Oct 10, 2011

How to Take Fall Photos

Fall is just about the best season here in Georgia -- it usually lasts quite a few weeks and the colors from the trees are amazing. We are just starting to see reds and oranges (with an abundance of yellow), so now is a great time to snap pictures of your kiddo. Here are a few hints on how I got these great autumn photos.

My little boy loves to "explore" trails and sidewalks around our place. Our deal is that he gets to explore and I get to take photos, plus he'll agree to pose for some of them too. I took these shots around 5:00 p.m. after a drizzly day with overcast skies. Overcast = soft even light for outdoor shots. Perfect.

The first and second image show how tricky trees can be -- you want to capture the fall foliage, but you don't want a branch or tree trunk coming out of your subject's head. I squatted down to take the first shot so I could get the tops of the trees behind his head. The second shot was just positioning. I had to place my boy in a certain spot so that I could get a full body shot with the trees and without head-branches.

The last portrait is one of my favorites from 2008. I try to take photos of my son in each season every year. It is so fun to look back at how he's grown in the past 3 years. This was taken close to the Alpharetta Big Creek Greenway, which turns a gorgeous golden yellow one week out of the year. It is a magical time to take pictures there, and I'm hoping I'll be able to catch it again this year. And that's my last advice of this post: if you see a gorgeous fall setting, get back there with a camera as soon as possible (or better yet, keep your camera with you). A couple days can make a huge difference in whether or not the trees still have their colorful leaves. Happy fall!


Nov 29, 2010

Smiles in Autumn | Roswell GA Family Photography

Back from Thanksgiving and back at editing. This sweet family was really fun to work with, especially their little boy! I don't think I've ever had such an easy time getting smiles out of a child. He was fun and playful and very good with his sister. Little sis was a little harder, but some playing in the leaves got that grin. You can see another image of this sweetie on our Facebook page.

I shoot mostly families, especially those with young children. A few people have asked me how I can manage that. I've found that parents go a long way in setting the stage for the shoot.

Here are my top tips for parents during a family shoot:

  • Expect your children to take a little time to warm-up to the photographer. Many kids are shy at first.
  • Bring wipes or tissues! Runny noses and drool don't make for good photos.
  • Kids may need to take small breaks in between poses. Remember, they are working. Posing for photos isn't easy for a busy child!
  • Allow the kids to wander around and explore (with a parent or sibling for safety) while the photographer is shooting others. This keeps them entertained and may provide opportunities for fun candids.
  • Don't use harsh words or upset children. Avoid using threats or bribes.
  • Let the photographer coax the smile or reaction out of your child. It's their job! (And having multiple people try to make a child smile can confuse him/her.)
  • If the photographer asks you to help get a smile, stand directly behind the camera so the child is looking in the right direction when he/she smiles.
  • If your child does have a melt down or a crying fit, let it happen, and then let it pass. You'd be surprised how fast kids can be back to normal.
  • Expect babies, toddlers (and dare I say it? dads, too) to be "done" after 45 minutes to an hour of shooting.
  • Remember, a family shoot is fun, but it's also work (for everyone). It's very appropriate to go out for ice cream or enjoy a treat together after the shoot.


Apr 12, 2010

How to Capture Some Quick Spring Portraits

Spring is a great time to capture portraits with the blossoming flowers. Here's my "how to" guide with a few shots I did at a friend's house using this technique. 
  1. Find a flowering bush. Bushes are better than trees for quick spring portraits because they are close to the ground and don't cause awkward mergers like tree trunks do.
  2. Wait until the late afternoon or early morning when the light is best.
  3. Put your subject as close to the bush or even within the bush.
  4. Shoot close to the subject and shoot at an angle that fills the background of your image with flowers or spring leaves.
  5. Edit as desired! (Psst... I use a texture on the first image. If you want to learn how to do this and other custom editing techniques, sign up for online mentoring sessions! I'd love to teach you.)


Nov 24, 2009

Buy One Get One Free 8x10 at Walgreens

I've recently started clipping coupons thanks to a couple friends and a workshop at church that taught me some tricks about saving money this way. So, I was thrilled when I found a coupon in this Sunday's paper for a Buy One Get One Free 8x10 at Walgreens. The coupon says if you order online, just "enter promtional code 2FOR1 for online checkout." Awesome! The code is good through Sat. 11/28/09. With Christmas coming, I'm thinking about all the photos I will want to print for presents. This is a nice way to get one of those for free.

Remember, for an 8x10 print, you will be getting a print that isn't be the same aspect ratio as the original file. Plus, labs always upsize the image so it will "bleed" (a printing term here) all the way to the edges of the paper. Here's how a photo of my photographer friend and aunt will be cropped for an 8x10 print:

Original Image


Cropped Image for 8x10 print:
Loses some of the camera at the bottom and the hat on top.

Aspect ratio is another problem with prints, but as long as you are aware of the limitations of your intended prints, you can shoot photos that have a little leeway for cropping.

Jan 14, 2009

Post Processing: College-Age Portrait

A post! Finally! I had a wonderful Christmas vacation and a great opportunity to photograph some of my family over the past couple weeks (including this gorgeous shot of my little sis). But I had to take a bit of a hiatus from the blog for the vacation, unpacking, and getting my family life in order for the new year.

This post is a little of a "how to" about post processing. When I first started, I did little if any post processing on images. But as I've grown in photography, I've come to realize how much of a difference subtle changes can make. I've also had a ball doing some experimental work as per clients' requests. Enjoy!

1. The original image. We both liked the pose and the wind-blown hair. The image itself is beautiful and would have been a keeper without any editing.

2. A bit of face cleanup. We all have blemishes we would rather not be preserved for posterity. I do cleanup work on faces pretty often. It can be tedious, but the result is very nice.

3. Some hair fixes. There was a bump on top of the head that wasn't too glamorous, and then the hair across the neck didn't look quite right. The first hair fix was easy. That second one was tough because I had to recreate the parts of her neck where the hair had been.


4. Saturation and levels adjustment. I upped the saturation (deepness of the colors) and adjusted the levels (black, white, and midtones) of the photo to make her really "pop." It also added a lot of warmth to the photo I like.

5. Screen layer. This is a new thing I've been doing to my images: adding a screen layer on top to lighten shadows and give the face a kind of glow. On step 4, I generally oversaturate a bit so that the screen layer doesn't take away from the color of the image.

6. Vignette. Adding a subtle vignette really focuses your attention on the subject. It's usually my last step before finishing an image.

Oct 23, 2008

Special Edit: Custom Matte-like Borders


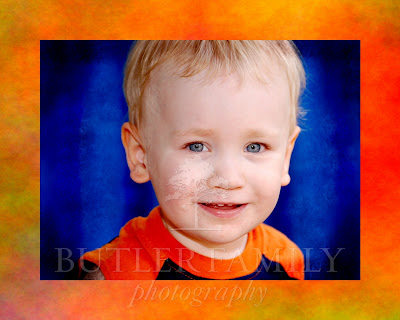
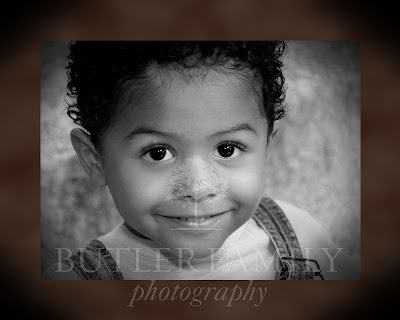
Recently, we were invited to a special joint birthday party for these cousins, and I had a great idea for a gift: custom 8x10s. Since I already had photos of the 4-year-old boy, I concentrated on getting a good photo of the 2-year-old while he was visiting his cousin a couple days before the party. What a surprise his mom had in store when she helped him open his gifts!

My idea was to create a portrait that was immediately frame-able, no matte required. I thought it would be fun to create the illusion of a 3-dimensional matte with borders and vignettes. Here's how I did it.

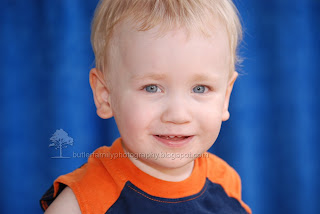
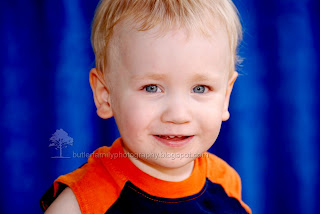
1. The original photo was darling, but needed a little help to make it "pop." (That's a fleece blanket in the background hung over the railing. I'm all about impromptu backgrounds.)


2. After saving the photo to my computer, I played with the levels a bit to bring out the vibrant colors in the boy's eyes and shirt.


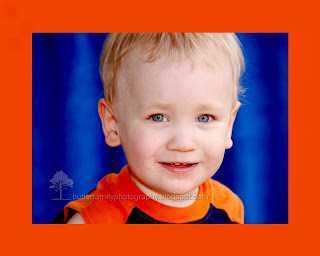
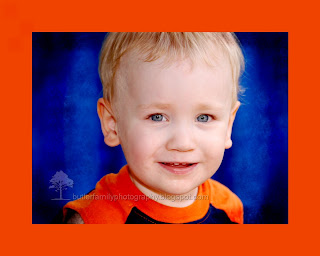
3. I created another file for the 8x10 print and used the color from the boy's shirt to fill the background. This would eventually become the "matte" border of the 8x10.


4. On another layer, I dropped in the photo of the boy and cropped and resized it so there was a 1" border around the 8x10. Thank goodness for guides! They make measuring easy.

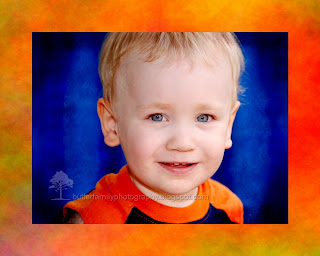
5. Then came the fun part! I created a vignette using the burn tool and a fun brush shape. Although I could have done the vignette with a dark oval and feathered edges (like I did on his cousin's portrait), I wanted this one to have a rougher look. So I did the vignette by hand (well, actually, by mouse). I also dodged a bit of the background to make it blend in better.


6. Finally, I used a pattern and then a filter to create a more interesting texture for the border. And ta da! It's done. (It took me about an hour to do all of this.)


I used the same basic method to create the second custom 8x10, and yes, their parents loved them! (And I had so much fun doing them!)

Oct 16, 2008

Playtime: Child and Mom photo shoot


This darling three-year-old boy and his mom wanted some pictures together and some portraits for the little guy's fourth birthday coming up soon! We decided to stay close to home and got some fabulous pictures just 5 minutes from their home on the Alpharetta Greenway and the little park by the YMCA. I had such a hard time picking which photos to post, they turned out so well! I love the ones of the little guy on the slide: the depth of field is great, the color is beautiful, and the expression is priceless. But I'm also really charmed by the last image. (Jeans look so good in black and white.) His mom told him to "Hug your Thomas!" (He's a big Thomas the Tank Engine fan.) Snap! snap! we got it.

There's a trick to getting a young child to smile for the camera, especially after the novelty of picture-taking has worn off (which in the case of most children is about 5 minutes into the shoot). Here are some of my tried-and-true methods. First of all, know the child's name. I make sure to memorize all of my clients' and models' names before the shoot. Second, explain to adults and other children there that it is your job to make the child smile, not theirs. When I do posed shots, I have to tell parents and siblings not to look down at the baby (or toddler) when I am trying to get their attention. It's so hard for them not to look, but it really works. If you are doing portraits of a child alone, you can ask the parent to help you catch the child's attention, but they need to stand directly behind the camera so that the child's eyes are directed towards the lens. Also, choose a location that has play equipment or something the child can explore while you are shooting. Bring a toy, a rattle, puppet, or other attention-getter to wave in front of the child or let him or her play with while you shoot. Play peek-a-boo. Make funny faces, sounds, and expressions. And most of all, have fun! Children love to play, so make the photo shoot a playtime and you'll have the same problem I do: too many cute pictures to choose from!

Jul 10, 2008

Location Scouting


Today I went location scouting with my little guy after lunch and again after dinner while Jacob watched the baby for an hour. I'm always on the lookout for good spots to take photos, but lately I've been working on finding locations close by. That way, when clients ask if I know a good spot to take photos, I have a few that I know well and that are easy to get to.

I've been using Google Maps lately to do some initial decision-making on where to go. Google Maps has satellite, terrain, and street views that are quite accurate. From those, I try to find local ponds, trails, and other spots I wouldn't ordinarily see on a regular map. (The first two photos from this post are from a beautiful little trail and pond area I found this way.)

This afternoon's project was to find out what the Big Creek Overlook area looked like. On the satellite view, I could see a nice open area (rare in tree-covered Alpharetta), and I thought a field or an open area like that might look great in some photos. Well, when I got there, I found that it was a residential area. I really loved the look of the field I could see from the road though. So with baby in arms, I knocked on the owner's door and asked him if I could go down and take some pictures of it. "Knock yourself out," he said. The second two pictures are from this lovely area.

An artist friend of mine once asked me how I compose a photograph, and I've been thinking about that question again today. A photograph is a two-dimensional object, but you can create the illusion of three dimensions by including a foreground (slightly out-of-focus), middle ground (in focus and where the subject of your photograph will be), and background (blurred nicely by a wide aperture and long focal length). The third picture demonstrates the kind of composition I'm talking about.

Then again, there are times when you want your photograph to have that two-dimensional quality. After my initial success with some silhouettes, I'm excited to try them again. So, after dinner tonight, I scouted out some great spots for silhouettes at Alpharetta High School. Now all I need are some people to put in my new locations!

Mar 6, 2008

Snapshot Tips


Marchet writes:

I was over at a friend's place the other day shooting for fun and letting our babies play together. I caught this great moment of her little one. I also played with her point-and-shoot digital camera, and shared with her some of my tips for better digital photography. Here are some of my suggestions:

1. Focus first; then shoot. Press the shutter release button (the button you use to take a pictuer) half-way down to focus on your subject. Then, press the shutter release all the way down to take the shot. So many people don't know this! But it's one of the easiest ways to improve your photography and avoid the "blurs."

1. Avoid using the flash indoors. When I first started out in photography, I was dismayed by all the dark shadows I was getting behind subjects when I shot indoors. I realized later that it was because I was using the built-in flash. (It has to do with hard light, if you want to look up soft and hard lighting basics on your own.) Without the flash, I have to take more pictures to get a good enough shot, but I'm a lot happier with the results.

2. Get in close! Choose ONE subject for your photo. Then get in close to and shoot that. Is it the face? Shoot just that. Is it the leaf or the piece of cake or the car fenders? Shoot only that. Don't worry about other people or objects you want to capture. Do them one at a time and you will get much better shots. For groups of people, think of the relationship between them as the subject, and not the people themselves.

3. Stick to a simple background. If you can position your subject in front of a plain, unimportant background, your shot will be much better. This is because there's no competition between your subject and the background. The picture above was taken with a big screen TV behind the baby.

4. Shoot at eye-level of the subject. This is perhaps most important for people shots. Generally, the best photos of children are taken on the ground where they are! Also, (I had to learn this the hard way) avoid taking shots "up" to the person's face. This makes everyone look like they have a double chin, even me!

5. Experiment! Do you know where your camera manual is? Have you even opened it? Have you ever taken your camera off of the "Auto" setting? Try it! You'll get a lot of bad shots at first, but then you'll start learning and that's when the fun begins.

For more great tips on photography, I recommend Mastering Digital Photography by David D. Busch and How to Photograph Absolutely Everything by Tom Ang. These books are great for beginners!